Last updated 2026.09.30 · Edited by silveston · Compiled by an independent hobbyist without professional credentials
Start with Space: Floor Area and Depth Matter

For one adult, a floor-oriented enclosure around 90×45×45cm is a practical minimum starting point. Adults can exceed 30cm and need room to travel and dig. At equal volume, a long, wide enclosure is more useful than a tall, narrow one. A 120×60cm floor makes thermal, moisture and refuge gradients easier and increases foraging distance.
A juvenile can begin in a smaller temporary enclosure, but small animals do not justify permanent restriction. Compact enclosures overheat quickly and make warm and cool zones difficult to separate. Use probes at two locations and set an upgrade point in advance based on growth. Visibility for the keeper should not replace behavioral space.
Doors and lids must lock securely. Although terrestrial, fire skinks can climb décor and silicone corners and can push into gaps. Check cable ports and vents. Place heavy rocks or structures securely on the enclosure floor before adding substrate so a tunnel cannot undermine them and cause a crushing injury.
Single housing is the default. Several animals may occur in one wild microhabitat, but a captive enclosure concentrates competition over heat, food and retreats. Mis-sexed pairs can lead to breeding or conflict. Individual housing also makes intake, feces, body mass and disease signs far easier to track. Breeding introductions require a spare enclosure and an immediate separation plan.
Run the completed enclosure empty for several days before arrival. Record temperatures before lights, on the basking surface, inside the cool retreat and at the nightly low. Confirming that the equipment produces the intended conditions reduces emergency changes and repeated capture during acclimation.
Heat Gradient, Probe Placement, Night and UVB

A useful target is roughly 33–36°C on the basking surface, 25–29°C warm-side air and 24–27°C on the cool side. These figures only work as a gradient the animal can leave. Measure the surface beneath the lamp with an infrared thermometer and measure air at skink height with fixed digital probes. A dial gauge high on the wall does not represent a ground-dwelling animal’s exposure.
Concentrate heat at one end and control it with a dimming thermostat. Wattage cannot be copied across rooms because room temperature, ventilation, enclosure material and lamp distance all change output. Adjust to the measured surface target. Whole-floor heat can conflict with the instinct to dig downward to cool and can create hot contact zones, so it should not be the primary heat source.
Turn off all visible light at night. If the room remains around 20–22°C or warmer, allow a gentle natural drop. In colder homes, use a non-luminous ceramic heater or radiant panel on a thermostat without maintaining daytime basking heat. Red or blue night lamps may look dim to people but can disrupt the animal’s light-dark cycle.
Treat UVB as routine margin for healthy care rather than an optional luxury. For a species using filtered forest light, an exposed-zone UVI around 1.0–2.5 with near-zero shaded retreats is a practical range. A 5–7% T5 HO lamp is common, but reflector, mesh, distance and lamp age change actual UVI. Measure with a Solarmeter 6.5 when possible and follow the manufacturer’s distance and replacement data.
Keep the photoperiod near 12 hours with a timer. Overlap UVB and the warm basking zone so heat and light are selected together. Bright 6500K visible light supports plants and a clear day signal but does not replace UVB. Glass and most clear plastics block useful UVB, so check every material between lamp and animal.
| Measurement point | Starting range | Tool and interpretation |
|---|---|---|
| Basking surface | 33–36°C | Infrared thermometer on the contact surface |
| Warm-side air | 25–29°C | Digital probe at skink height |
| Cool-side air | 24–27°C | Measure air outside the moist retreat |
| Exposed UV zone | UVI 1.0–2.5 | Provide shaded escape at the same time |
| Night | Gentle drop if room stays ≥20–22°C | Non-luminous backup heat only when needed |
Humidity, Ventilation, Deep Substrate and Hides

Use 60–70% average ambient humidity as a starting point, with a daily rise after misting and a fall through ventilation and heating. The cool end and burrow should remain moister while the basking surface dries quickly. Place a hygrometer probe away from direct spray; a brief 90% reading immediately above wet soil is not the whole enclosure.
Provide at least 10–15cm of substrate and preferably more, deep enough to cover the body and hold a tunnel. A blend of unfertilized organic soil, coco fiber, leaf compost and play sand can be kept damp without releasing water when squeezed. Let parts of the surface dry while lower layers retain moisture. Mud, sour odor or persistent saturation indicates poor drainage or ventilation.
Avoid aromatic cedar or pine chips, calcium sand, sharp gravel and dusty dry powders. The skink hunts on the floor, so incidental ingestion is possible with any loose substrate. A healthy animal swallowing a trace of soil at correct temperatures differs from exposure to large particles, heavy dust and poor digestion under cool conditions. Bowls and tong feeding can reduce risk.
Provide at least one warm dry hide and one cool moist hide. Cork, partly buried logs and low caves that connect to the substrate can function as burrow entrances. Leaf litter provides visual cover and foraging opportunity; living plants add shade and transpiration. Every structure must remain stable and cleanable.
Humidity and ventilation are compatible requirements. Keep the lower substrate moist while moving air through side and top vents. Continuous condensation, a surface that never dries and a musty odor indicate stagnation rather than healthy humidity. Adjust substrate water, airflow, temperature and drying time together. If a fogger is used, disinfect its reservoir and tubing regularly.
Diet Variety, Portions, Calcium and Water

Use live invertebrates as the staple. Rotate crickets, dubia roaches, locusts, silkworms, black soldier fly larvae, suitable earthworms and safe snails to vary movement and nutrition. Keep fatty or heavily chitinized items such as waxworms and many mealworms as a smaller portion. The lesson from 22 wild prey categories is variation, not a numerical target.
A conservative prey-width rule is no wider than the space between the skink’s eyes. Offer juveniles smaller prey more frequently; allow adults a productive hunt and then assess condition between meals. Record the amount consumed in roughly 10–15 minutes, leftovers and weight trend instead of following one fixed insect count. Reduce total energy and fatty feeders if the abdomen stays distended or fat pads become prominent.
Gut-load feeders for 24–48 hours with nutritious greens and a formulated feeder diet. Dust calcium lightly according to product concentration and measured UVB; use a multivitamin less often according to its label. Thickly stacking several supplements at every feeding can create excess. Both deficiency and excess of vitamin A matter, so do not increase retinol-containing products casually.
Provide clean water at all times in a low, stable bowl. Rinse daily and replace immediately after contamination. Misting supports substrate moisture and droplets but does not replace a water bowl. An animal may also obtain water from prey and humid retreats, so assess eyelids, skin, urates and body mass together rather than relying on witnessed drinking.
Do not leave feeders overnight. Crickets and some roaches may hide and bite a resting or shedding skink, while dead insects create hygiene problems. Count and remove leftovers. Tong feeding can build trust and confirm intake, but replacing every hunt with tongs removes foraging opportunity. Let some prey be searched for among clean litter.
Shedding, Behavior, Handling, Cleaning and Cohabitation

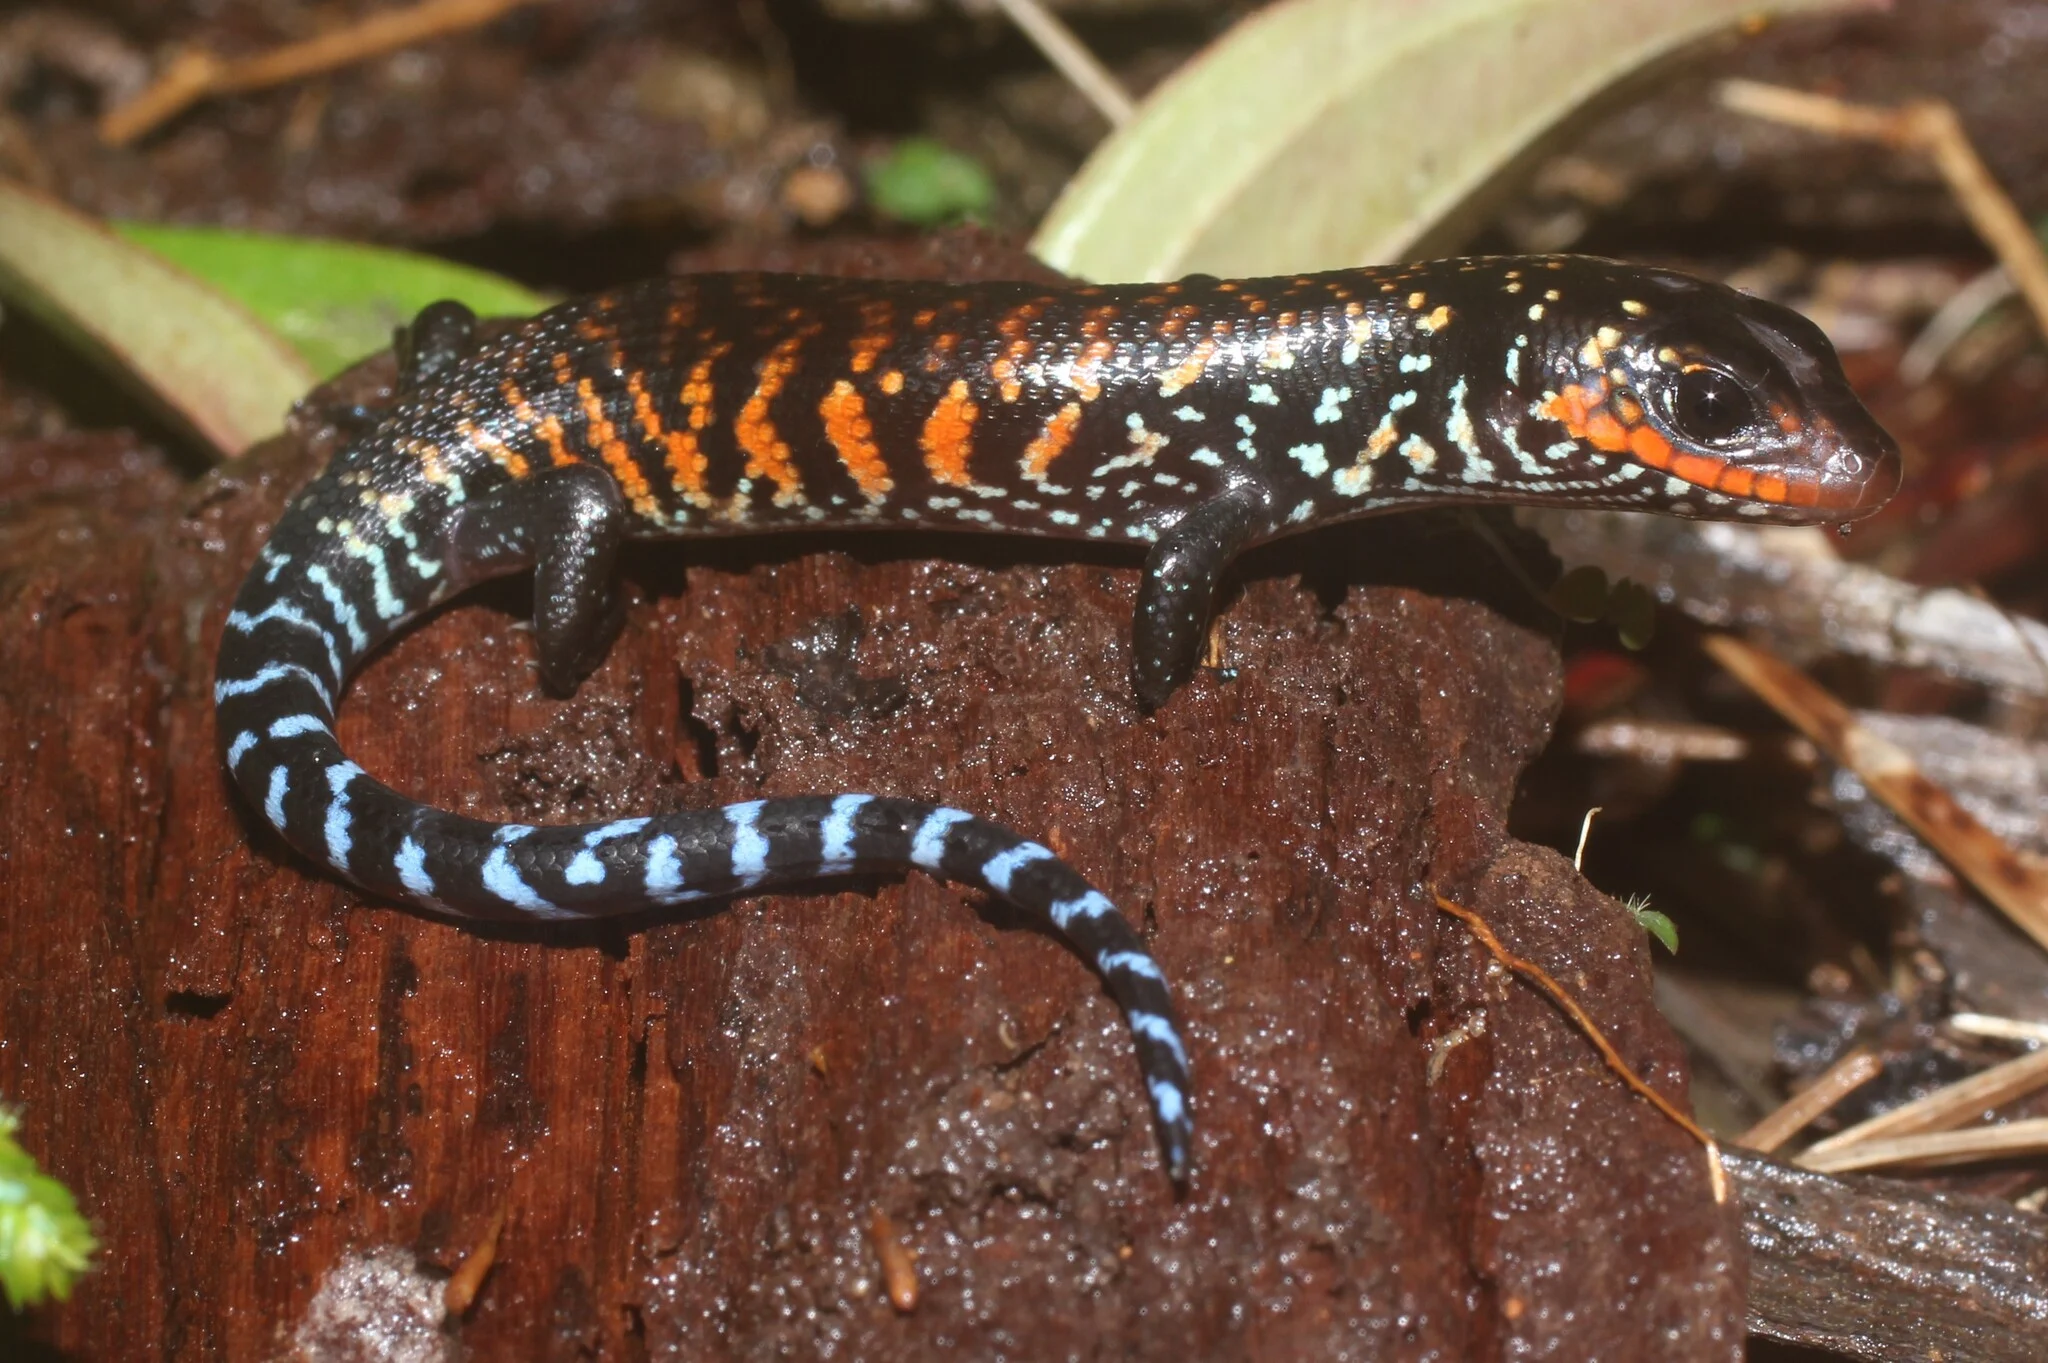
Color may dull and appetite may decline before shedding. Fire skinks shed in pieces rather than one complete skin. Check toes, tail tip and eye margins for constricting rings. Do not peel them off forcibly; provide a humid retreat, correct substrate moisture and textured cork. Repeated retained shed can also reflect dehydration, nutrition or disease and warrants a reptile veterinarian.
A newly acquired animal may remain hidden for two to four weeks or longer. Daily extraction does not teach safety. First establish regular light and feeding times, quiet movement and a positive association with food at the tong tip. After the skink emerges voluntarily, rest a hand on the floor and let it choose whether to approach. A grab from above resembles a predator strike.
For necessary movement, support the whole body from below and keep handling brief. Never pull the tail or drag an animal from soil. Assume it may bite, keep it away from the face and supervise children at floor level. Stillness can mean tolerance or defensive freezing; faster breathing, rigid posture, closed eyes and repeated escape attempts are stress signs.
Daily work includes fresh water, removal of leftover food and feces, and checking temperature and humidity. Weekly, clean around hides and the water bowl more thoroughly and test equipment. Full substrate replacement depends on the system and contamination. Bioactive does not mean maintenance-free: remove dead insects, mold and standing water, and manage the cleanup crew.
Quarantine a new animal for at least 60–90 days with separate equipment or in another room. If tools must be shared, care for established healthy reptiles first, handle the newcomer last and disinfect afterward. Fecal testing and a reptile veterinary exam help assess parasites and general condition. Wild-caught animals may carry higher parasite, dehydration, injury and chronic-stress risks; a seller’s claim of a strong feeding response is not a health certificate.
Health Warning Signs and the Beginner’s Checklist


The difference between normal hiding and illness is the pattern of response. A healthy hidden skink still responds to thermal changes and food and moves purposefully when it emerges. Warning signs include sustained weight loss, deformed jaw or limbs, repeated falling, open-mouth breathing, nasal fluid or bubbles, persistently closed eyes, oral discoloration, continuing diarrhea, blood in feces or prolapsed tissue that does not retract.
Long basking is not automatically disease; the animal may be acclimating or digesting. Persistent attachment to the hot spot can also mean the cool end is too cold or its hides feel unsafe. Repeated soaking may accompany shedding but can also suggest mites, overheating or skin irritation. Record environmental values and duration instead of assigning a diagnosis to one behavior.
Use the same scale at a similar time weekly or every two weeks. In juveniles, follow the growth trend; in adults, watch rapid change and body shape. Direction over several weeks matters more than a small daily change from water or feces. Standardized photographs from above, the side and the tail base help compare muscle and fat.
Many beginner errors come from achieving one number while removing choice: heating the entire enclosure above 30°C, blocking ventilation to hold 70% humidity, or using shallow bedding because a burrow is hard to see. The skink must be able to move among warm, cool, drier, moister, exposed and hidden zones. The keeper maintains several safe options rather than one perfect point.
Do not diagnose disease or improvise medication. Force-feeding a cold animal or estimating human antibiotics, dewormers or vitamins can worsen the condition. For urgent signs, prepare a warm transport box with paper towel and a hide and contact a reptile-capable veterinarian. Bring weight records, temperature and humidity logs, feeder and supplement names, recent fecal photographs and source history.
The final checklist is straightforward: broad and deep enclosure, measured thermal gradient, escapable low-level UVB, damp but draining digging substrate, dry and moist retreats, varied gut-loaded insects, clean water, individual housing and regular weight records. The Fire Skink Natural History Wiki provides the ecological and taxonomic background.
- Daily: water, leftover prey, feces, temperature, humidity, breathing and eyes
- Weekly: weight or body record; probe placement and lamp function
- Monthly: fixtures, vents, substrate depth, mold and pest check
- Urgent veterinary advice: breathing difficulty, neurologic signs, bleeding, persistent prolapse or rapid weight loss
Treat the first 2–4 weeks as an acclimation period and minimize unnecessary redesign and handling. For an animal already cleared at intake, stabilizing water, retreats and the thermal gradient may be more useful than chasing it for a same-day weight. Later measurements should use the same scale and time of day. A sustained decline over 2–4 weeks, appetite loss and fecal changes matter more than one isolated number.
Gut-load feeder insects for 24–48 hours with vegetables and a balanced commercial diet. Adding many hungry crickets increases quantity, not nutritional quality. Choose prey generally smaller than the skink’s head width, count what enters and remove what remains. Crickets left overnight can bite the skin and toes of a hidden skink.
Calcium and vitamin supplementation must be interpreted alongside UVB output, prey variety and life stage. Heavy multivitamin dusting at every meal can create excess rather than a safety margin. Follow product concentration and veterinary guidance, and check whether a calcium powder already contains vitamin D3. Adequate UVB does not remove the need for dietary variety, and supplements do not replace UVB.
During routine substrate maintenance, remove contaminated zones first rather than overturning the entire enclosure each time; this preserves some familiar scent and tunnel structure. Mold, a mite outbreak, persistent odor or suspected infection may require complete replacement and veterinary hygiene guidance. A bioactive setup is not self-cleaning: feces, drainage and the cleanup crew still require inspection.
Prepare for power and equipment failures with minimum-maximum thermometers, a spare thermostat, a ventilated carrier and insulation. In cold weather, a sealed warm-water container can provide temporary heat outside the animal’s direct reach, but ventilation must remain adequate. During summer overheating, cool the room and improve airflow instead of placing ice in the enclosure. Emergency changes should be gradual and measured.
Use one weekly format for basking-surface, warm-retreat and cool-side temperatures, humidity highs and lows, food type and count, feces, sheds and body mass. Photograph the animal under consistent light and angle so body and skin trends can be compared. Records separate vague impressions from real change and give a reptile veterinarian a usable environmental and clinical timeline.
During shedding, keep the humid retreat damp without free water and inspect toes and the tail tip for dry rings of retained skin. Do not peel skin or apply oil before correcting the environment and seeking veterinary technique. Repeated incomplete sheds can reflect dehydration, nutrition or skin damage as well as inadequate humidity, so the underlying pattern needs review.
When removal is necessary, approach near floor level and support the whole body with both hands instead of grabbing from above. Never lift by the tail, and close doors and windows even for a short transfer. Handling should serve examination and care rather than display. Twisting, gaping or rapid breathing means the session should end and recovery time should be given.
References
- ReptiFiles Fire Skink Care Sheet — enclosure, lighting, humidity and feeding.
- Herpeton Academy African Fire Skink Care — thermal gradient, UVB and management.
- Baines et al. (2016). How much UV-B does my reptile need? Journal of Zoo and Aquarium Research 4(1): 42–63.
- Akani et al. (2009). Wild activity and habitat selection.
- Eniang et al. (2014). Seasonal and habitat variation in wild diet.
- The Reptile Database: Mochlus fernandi.
Suggest an edit
Tell us which sentence may be incorrect and provide a verifiable source. Submissions are reviewed before publication.